Hello there friends and a happy 1st Sunday of Advent to you! Around here we are tentatively beginning this long season of celebration and traditions, something I’ve been looking forward to since the last Christmas season.
This year I decided I needed to make a nice Christmas wreath for the mantle, although most of ones I see in the store are not really my style. I like old things, and rustic things, and so I knew I needed to put my own spin on a traditional Christmas wreath if it was going to be what I wanted. So earlier in the week we set out for some supplies and this is what was created:
 I’m pretty pleased with what the end result was— rustic grape vine and red checked ribbon offset with Christmasy greenery and some of my favorite vintage photos. It wasn’t that hard to make so I thought I’d share the process with you. Are you ready?…..Here goes:
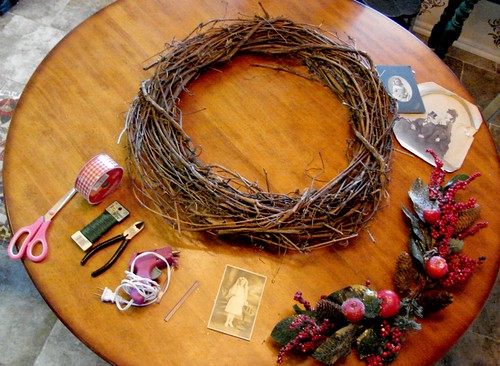 Everything I used for the wreath is shown here on the kitchen table. A plain grape vine wreath that you can get at any craft store (this came from Michaels) as well as a premade floral piece that will be my Christmas greenery. I bought some ribbon to fancy it up and brought out some of my old photos, a glue gun (and glue) floral wire, wire cutters and scissors.
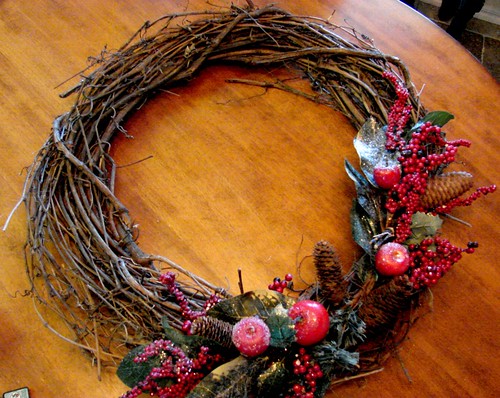 First I attached the floral piece to the wreath (you could use separate floral picks if you prefer, but I liked that this bunch of fruit and leaves and berries was all in one piece) I bent the arrangement to match the curve of the wreath and then attached it with some floral wire.
 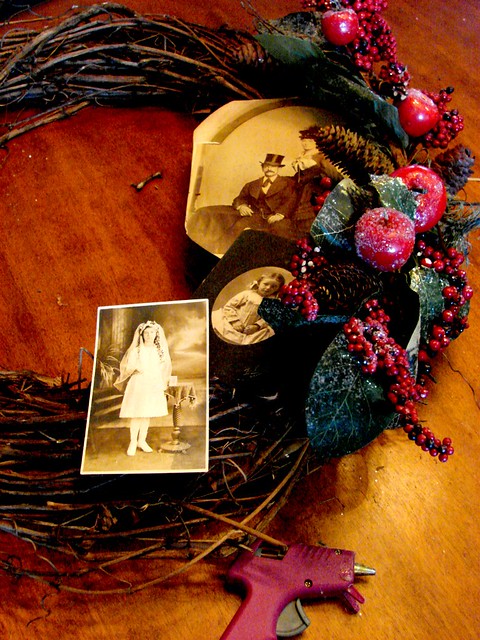 Then came the arrangement and placement of the photos. I hate the idea of damaging vintage photos, so used my glue sparingly and made sure no glue would touch the front of the photos. All of these photos came from the antique mall, so I’m not using family heirlooms here. I like the idea of these once forgotten and homeless photos now getting a chance at the lime-light for our holiday festivities. I hope that they’d all be pleased!
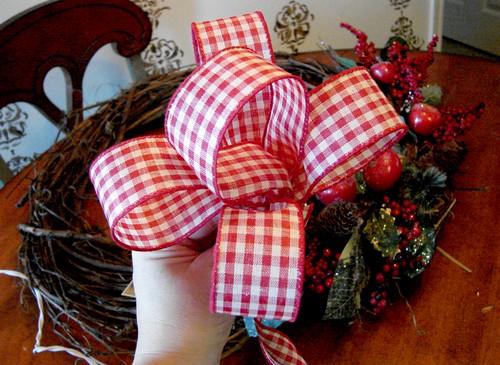 Then I made my bow from the ribbon. I made my bow by creating a center loop, then making more and more loops around it. I held them in place with my hand and put a dab of glue and the florist wire to hold the bow in place. Then I fastened it into the middle of the floral arrangement.
 After situating my bow, I cut the ribbon free and then wound the ribbon loosely around the rest of the wreath, attaching it with a little glue.
 And then, voila! A new wreath was born! And up on the mantle it went. I think it’s easily one of my most favorite wreaths I’ve ever made and I think that since its holiday look is subtle, I could probably leave it up until Valentine’s Day.
Hope you enjoyed the little craft lesson!~
H


Leave a comment